|
| Match Play Cube Handling |
In bridge such a ploy would be unethical, but in backgammon and poker this tactic is completely acceptable. Doing this creates the impression that you hate to drop (which, on principle, you should), and so your opponent will tend to be more cautious in the future about increasing the stake. As a result, you may get a free ride for several rolls later on, during which you may throw the miracle roll that turns the game around.
Whatever else may be said of it, the doubler is a particularly lethal weapon in tournament play, where it can actually favor the weaker player — if only he recognized its power and knew when and where to exert it.
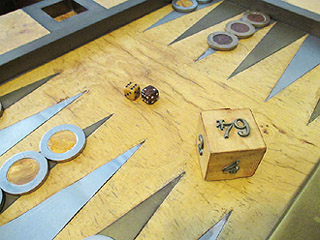
Not long ago, for example, a comparative beginner drew an expert in the opening round of an important tournament. It was a 15-point match, the score was 6–3 in favor of the expert. In the next game the expert gave the beginner an early double, almost expecting him to drop because he had doubled. But the beginner was not so easily cowed; he accepted and the doubler was now at 2 on his side. The game continued, swinging back and forth, and several moves later, one of the beginner’s men was captured and placed on the bar. The expert, white, had a five-point board, but had a blot on his 4 point, as well as two additional blots in his outer board. The beginner had managed to construct a prime, as is illustrated in Diagram 68.
|
6
MATCH TO 15 3 |
|
Should Black |
As the beginner (black) prepared to roll, he was more than a 2 to 1 underdog (25 to 11, to be exact) to come in on white’s 4 point. But had the beginner thought of it, there was a clever doubling tactic to be employed in this position. Even though he is the underdog, it is imperative that he now redouble.
In order to overcome the expert, he will have to win this game; thus he must double against the odds. In this position the expert would prefer not to be doubled. If the beginner rolls a 4, he will deal the expert a stunning psychological blow; he will almost certainly win 8 points, and the match will be in jeopardy.
This is just one example of how a beginner can use the doubler to compensate for his opponent’s superior technical abilities. If the beginner fails to hit the blot, he will fall behind 10–3 or possibly even 14–3. But if he hits, the score could be 11–6 in his favor. It is an immense opportunity and should be taken; in the parlance of baseball, it is not a time to bunt, but to hit away. (Needless to add, were the positions reversed, an expert would be most inexpert were he to redouble here.)
Whether or not the tyro hit the blot is irrelevant. The point is that like so many others in similar positions, he failed to recognize his opportunities. The thought of redoubling never crossed his mind.
Situations of this kind occur repeatedly in tournaments, and the inexperienced player tends to be too timid or too naive to capitalize on the leverage he has in the doubler. Of course the doubler is a two-edged threat, but the beginner can make use of it in a way no expert would consider doing. He must learn to recognize and then to snatch these major opportunities.
Tournament Tactics
Tournament tactics differ in many ways from money games and chouette. In tournaments, the only objective is to defeat your adversary, and the difference in your scores is immaterial; to win 15–0 or 15–14 is the same. Those 14 points have cost you nothing, whereas in a money game, you would be charged 14 times the stake.
Let us assume that you have an 11–1 lead in a 15-point tournament match. Early in the next game, your opponent has a remote chance, should everything go right for him, of winning a gammon. In the tournament you would drop if he doubles, remaining ahead 11–2; in money games, you would take every time. The strategies of the two types of play are vastly different. Indeed, the tactics are so dissimilar that it is as though you were playing with a different set of rules.
| ‘ | The strategies of the two types of play are so dissimilar that it is as though you were playing with a different set of rules. | ’ |
This vital factor should have an enormous effect on how you handle the doubler during your different matches. At different times in the same match in a tournament, it is possible to arrive at two identical positions which, in the one case, you would drop if doubled, and in the other you would take.
The Crawford Rule
A familiarity with the numerous complexities of the Crawford Rule is essential, and it is surprising that so few players trouble themselves with this crucial adjunct to tournament play.
The Crawford Rule stipulates that in, for example, a 15-point match, when one player reaches 14 and his opponent has a lesser score, the player who is behind may not double in the first subsequent game. When that game has been completed, however, he may then double at will. This rule applies each time one player is a point from victory; it is used in American tournaments, but not as yet abroad.
The Crawford Rule is an attempt to protect the player with the greater score, but in our view it does not go far enough. A fairer rule would be one that prohibits your opponent from winning more points than you can potentially win in any one game. For example, in a 15-point match, if player A is ahead 1–0, the most player B could win in the next game would be 14. If player B is ahead 10–7, the most player A could win would be 5, and so on.
Two-Away, Two-Away
The difference in tactics when the Crawford Rule is in use is complicated and far-reaching. Suppose that you are playing an opponent just as skillful as you are, and the score is 13–13 in a 15-point match. What will your doubling strategy be in this crucial game? Should you double early, late or neither when the Crawford Rule is in effect?
| ‘ | By doubling you have reduced this match to a one-game proposition, in which you have a slight edge. | ’ |
The answer is that you should tend to double earlier than usual, because you give up no leverage; that is, he has no advantage in owning the cube, since if he accepts, it will be the last game and there is no point in redoubling. Secondly, he is almost forced to take the double, since if he drops, he must win the next two games (barring gammons) to win the match. Therefore, by doubling you have reduced this match to a one-game proposition, in which you have a slight edge — obviously correct tactics.
The only time you should not double in this situation is if there is an inkling of a double game. In this case, you must go for it — of course taking every precaution not to lose a double game yourself. This latter strategy applies whether the Crawford Rule is in effect or not.
But in the exact same situation — that is, a 15-point match which is drawn 13–13, and no Crawford Rule — your doubling tactics are altogether different. There is no redouble here either, but in this instance your opponent has nothing to gain by accepting the double. Therefore he would drop and double you at the beginning of the next game. Your best tactic in this situation is to go all out to win a double game and the match — again attempting to ensure that you do not lose a double game yourself. Your first priority, then, is to set up a defense to prevent that possibility. Having accomplished this, you must try to secure the gammon, even at the risk of losing a single game.
In this situation, at what point should you double? The answer, regardless of the strength or weakness of your position, is “almost never.” If you double and he drops, you have won nothing, for the 1 point you have won is useless. Being ahead 14–13 only gives you the dubious privilege of dropping on the next game after the opening roll, when your opponent will certainly double you.
There is one specific exception to this rule. As is evident in Diagram 69, black is vulnerable to losing a gammon and the match if he does not hit one of white’s two blots. He has been in danger of losing a double game throughout, but now he unexpectedly finds himself a 5 to 4 favorite to win the match if he doubles.
|
13
MATCH TO 15 13 |
|
No Crawford rule: |
Since black will in all probability lose a gammon if he misses, he has nothing to lose here by doubling. He might just as well lose 4 as 2, since either loss will cost him the match. This is the kind of situation in which the thoughtless player will not consider a double, since he is so relieved at the possibility of saving a double game, but this is specious reasoning. Failing to double at this critical juncture is a deplorable blunder; it is tantamount to losing by default. This is his opportunity to win at no extra risk to himself; therefore black must double.
White’s tactics in this game have been absolutely correct. He has been going all out to win a double game, and since he has three men off, he now cannot lose a double game. Therefore he is able to play as recklessly as he chooses — unless black thwarts his plans by doubling, thereby putting him in danger of losing the match, from which he has hitherto been exempt. It is a marvelous moment for the bold and unexpected counterattack.
Given black’s crushing double, should white take or not? It depends entirely on the respective abilities of the players. If white is clearly the better player, he should drop, since in this special situation he is a 5 to 4 underdog. If he drops, the score will be 14–13 against him, but he will have a better than even chance in the next game. Why should white allow himself to become an underdog when he is the favorite? But if white is much the weaker player, he should take, since at the moment he is only a 5 to 4 underdog, whereas if he dropped, he would be much more of an underdog in the next game, given the superiority of his opponent.
Incidentally, in all money games, if black doubles in this position, white should take every time. He is only a 5 to 4 underdog, which is less than 3 to 1, in addition to which he has excellent gammon expectations. You may recall the question at the beginning of this chapter about whether or not to take a double in a certain position. This is a perfect example of that decision being dependent on many different factors. In one case, you take; in the other, you drop — and in both cases, the position is exactly the same. This is just one more indication of the kind of fluid reasoning backgammon requires.
The kind of reasoning and logic involved in the previous example will, if heeded, improve your game in all departments. It is worth remembering, since even experts are wont to overlook the subtleties of the doubler. In a recent tournament, two of the world’s top players, tied at 9–9 in an 11-point match, reached the position in Diagram 70.
|
9
MATCH TO 11 9 |
|
No Crawford rule: Should Black double? Should White take? |
In this position, black doubled and white took. Not only was it an atrocious take, it was an even more atrocious double. It is difficult to determine which player exhibited the greater folly. This is another example of translating your prerogatives from one context to another. In a money game, this is a definite take, but in a tournament with this score and no Crawford Rule, the position must be seen in a different light, since different tactics now apply.
If white drops, he has lost 1 point, which means next to nothing. True, he has given his opponent a free drop (see next section) on the next game after the opening roll, but this is a minuscule edge compared with the benefits he gains from dropping here. Since in the next game he will double at once and put the match on the line, to take the double in this dodgy position is absurd. And what does black gain by doubling? He assumes that white is going to drop, and so anticipates gaining one point. What black should have done in this position was to go for the double game.
What actually happened was that white took the double and won the game and the match. Black was furious that white’s ineptitude had been rewarded. White, having won, defended his take, insisting that his was the correct play.
White was challenged by a third party for a sizable wager; he could, said the third party, pick five independent experts, and if any one of them agreed with white’s decision, he would win the wager. After much waffling, white backed down. This is yet another example of how a player’s ego can obstruct his reason, causing him to justify an arrogant and indefensible play.
The Free Drop
We mentioned a tactic called the free drop. When you have reached 14 in a 15-point match and your opponent has some lesser odd number — such as 5 — you may utilize what is known as a free drop. If your opponent opens with, say, a roll of 3–1 and you now roll a 5-2, you should drop if he doubles.
|
5
MATCH TO 15 14 |
|
Should White |
There is no logical reason to play out the game in this position when you must play with even the smallest of handicaps. Dropping does not significantly affect the score, and given the respective opening rolls, your position is now inferior to his.
The reason why the score is not particularly affected is that your opponent still requires the same number of victories to win the match. At 14–5, and assuming he doubles on the first roll of every game, since he loses nothing by doing so, he requires five victories in order to reach 15 and to win. At 14–6, he still requires five victories to reach 15. You must learn to use this free drop at your first opportunity. Most players know enough to do this when the score is 14–13, but you can apply the same principle to any odd number. However, the number must be odd; it would be madness to let your opponent run from even to odd. Thus, dropping in situations of this kind is an excellent tactic to employ.
| ‘ | When you reach 1-away with the Crawford Rule in effect, it is always preferable to have your opponent at some lesser odd number. | ’ |
Tournament play is replete with sly conundrums that do not exist in money games. Hence, tournament play demands not only different skills, but more exacting ones.
For example, when you reach 14 in a 15-point match with the Crawford Rule in effect, it is always preferable to have your opponent at some lesser odd number. You prefer him to be odd. Conversely, if the final goal is an even number, you want him at an even number.
But the reverse is true when the Crawford Rule is not in effect. Whether your opponent’s score is odd or even will not alter your strategy to any great degree, but it is worth knowing whether you want your opponent at an odd or even number. It can influence your accepting a double, for example.
Regardless of whether or not the Crawford Rule is in use, when you get within 2 points of your goal, say 13 in a 15-point match, try your utmost to win a double game. To be within 1 point of your goal makes you vulnerable as soon as all restrictions on the doubler are released. It is not an enviable position, since in every game you play for the rest of the match, you can lose, given backgammons, as many as 6 points, whereas the most you can win is 1.
| ‘ | When you get within 2 points of your goal, try your utmost to win a double game. | ’ |
Therefore it is best to attempt to hurdle over 14 from 13 by attempting to win the double game. Furthermore, if you are at 13 and your opponent is at some lesser number, tend to take doubles if you are in doubt, because if you win the game you win the match.
Again, this is a paradox. To be at 14 is naturally better than being at 13. Even so, at 14 you have problems which would not otherwise exist. Your opponent controls the doubler, and it is of little or no benefit to you. He may double immediately at the beginning of every game at no risk. It is true that he might also double immediately if you were at 13, but he does so here at great risk, since you can win not only the game but the match, which would not have been true had he not doubled.
These details regarding unique or special uses of the doubler are vital educational aids for the ambitious player, and they are not difficult to learn or to remember.
Losing a gammon is the bugaboo of all backgammon players; it is the prevailing danger against which players are warned from the very beginning. Yet in tournaments there are situations where the loss of a double game is virtually no worse than losing a single game. Though most players fail to grasp this concept, it is a great advantage for those who do. But it only occurs in special situations.
In a 15-point match, the score is 14–12 (or any lesser even number) in favor of white, in Diagram 71. White has a man on the bar and now rolls a 4-1.
|
14
MATCH TO 15 12 |
|
White to play 4-1. |
Ordinarily you are taught to try to save a double game, but in this instance it is irrelevant, since you have virtually nothing to lose. If your opponent gets to 14–14 in this particular game, he is not much better off than if he were at 14–13 with his doubling privilege restored. The small advantage of the free drop is forfeited by white if he decides to go for the win and thereby loses a gammon, but it is worth it to attempt to clinch the match on this game.
The main danger to watch for is the loss of a triple game. In this position, were white to come in on the 1 point and play the 4 elsewhere, he might even save a double game. But these should not be his tactics. If he comes in on the 4 point, hits black’s blot on his 5 point and gets away with this bold play, it is his best chance to win the game and the match even though he is a distinct underdog to do so. However, it is most important that he avoid losing a triple game, but oddly enough, by coming in on the 4 point instead of the 1, he has minimized this danger. Triple games usually occur when a player holds his adversary’s 1 point and remains there for a long time. In sum, our recommended move is a bold but necessary play.
A variation of this principle occurred in another tournament match. The match was being played to 15 and the score was 14–8 in favor of black. In the position shown in Diagram 72, white, having waited intentionally, now doubled.
|
8
MATCH TO 15 14 |
|
Should White |
In both tournaments and money games, black would tend to drop, but given the score — that is, 14 to any lesser even number — black should take every time.
The subtle logic here is that since white is at 8, he needs four consecutive victories to win the match — excluding double games and assuming that it is legal for him to double and that he does so in each successive game after the opening roll. But if he were at 9 instead of at 8, he would need only three victories to win the match.
Therefore, since being at 9 is virtually as good as being at 10, white should double, hoping to bluff black into dropping. In over 90 percent of such cases the bluff would work. If white accomplishes this, he has, in effect, won a game by default and increased his chances of winning the match because he now needs only three victories instead of four.
On the other hand, in this instance black should take the double, regardless of the hopelessness of his position — unless, of course, there were any danger of losing a gammon. Should black accept the double and lose, the score will now be 14–10 in his favor, which is barely worse than 14–9.
The point being that the man who is behind is always trying to get from even to odd, and this is what black is trying to obstruct. Since the comparative values of 9 and 10 are almost the same, black accepts what appears to be an insane double (which in all money games he would drop) because if he loses this game he has lost nothing extra. and if he should win, he wins the match.
Guarding Your Lead
Any time you have a substantial lead on the score in a tournament and have accepted a double, there is almost no position which will arise subsequently in which you should redouble.
For example, in a recent tournament an expert was playing an average player in a 23-point match. Black was ahead 18–11 (certainly a substantial lead) and had accepted a double to 2 from white, the expert. The position then changed in black’s favor and he redoubled to 4. White accepted, and a roll or two later, though still well behind, he redoubled to 8. The reason for the redouble is obvious. If white loses at 4, he will be behind even more, 22–11, and is virtually out of the match. Therefore this is a must game for him — hence the redouble. As luck would have it, disaster struck black and white won a gammon or 16 points, winning the match 27–18.
| ‘ | Any time you have a substantial lead on the score and have accepted a double, there is almost no position in which you should redouble. | ’ |
Black had no one to blame but himself. He broke a cardinal rule by redoubling in the first place and deserved precisely what he got. If you redouble in such circumstances, you are giving your opponent enormous leverage and have reserved none for yourself. Had black won the game at 2, he would have held a 20–11 lead; even had he lost the 2, he would still have led 18–13. Thus, black in effect threw the game away.
In tournament play, one game can determine the outcome of the match. This is more true of tournaments than of money games or chouettes. The game is a series of all-or-nothing skirmishes, and unlike war, all victories are complete and absolute.
The point to remember is that nothing in backgammon is irrelevant. There are no flights of fancy, no odds and ends. Everything is built upon something else — logic upon logic upon logic. And at the heart of it all is the doubler — the ruling element without which backgammon would be just another lottery. Unless the beginner understands the doubler, he, like the gentleman from Armenia, will never be more than an average competitor.